November 2021

How to Weave on a Cardboard Loom!

Fall is my favorite season in the art room.  While we don’t focus too much on holidays, we embrace the seasons and fall is a time for fibers!  Weaving is my go to lesson to teach fibers to kids and we are weaving on cardboard looms!

Getting Ready to Weave!

I like to start my weaving lessons by reading one of my favorite books on the subject: The Goat in the Rug by Charles L. Blood and Martin Link.  I love this book because not only does it do a great job of describing the process and history of weaving but the story is told from the perspective of the goat.  It is hilarious!  If you don’t have a copy you can watch me read it HERE.
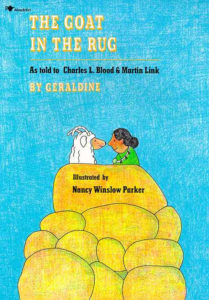
I love this book!!

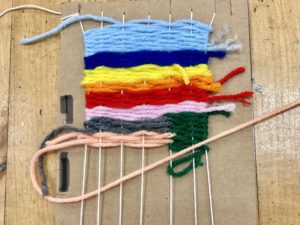
How to weave on cardboard

Third grade students are weaving on a rectangular cardboard loom.  You can buy cardboard looms from art suppliers like Dick Blick or you can make your own like I did.  For third graders, I use a 5×7 piece cardboard with slits across the top.  My looms have either 7 or 9 slits across the top and bottom.  We use colorful yard to weave some amazing designs.

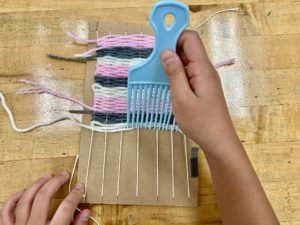
Teaching kids to weave

After we get our looms wrapped with the warp string, the students set off weaving.  We start with a basic tabby weave the first day or two then move on to more advanced designs.    

Dollar Store combs are great for tamping down the fibers

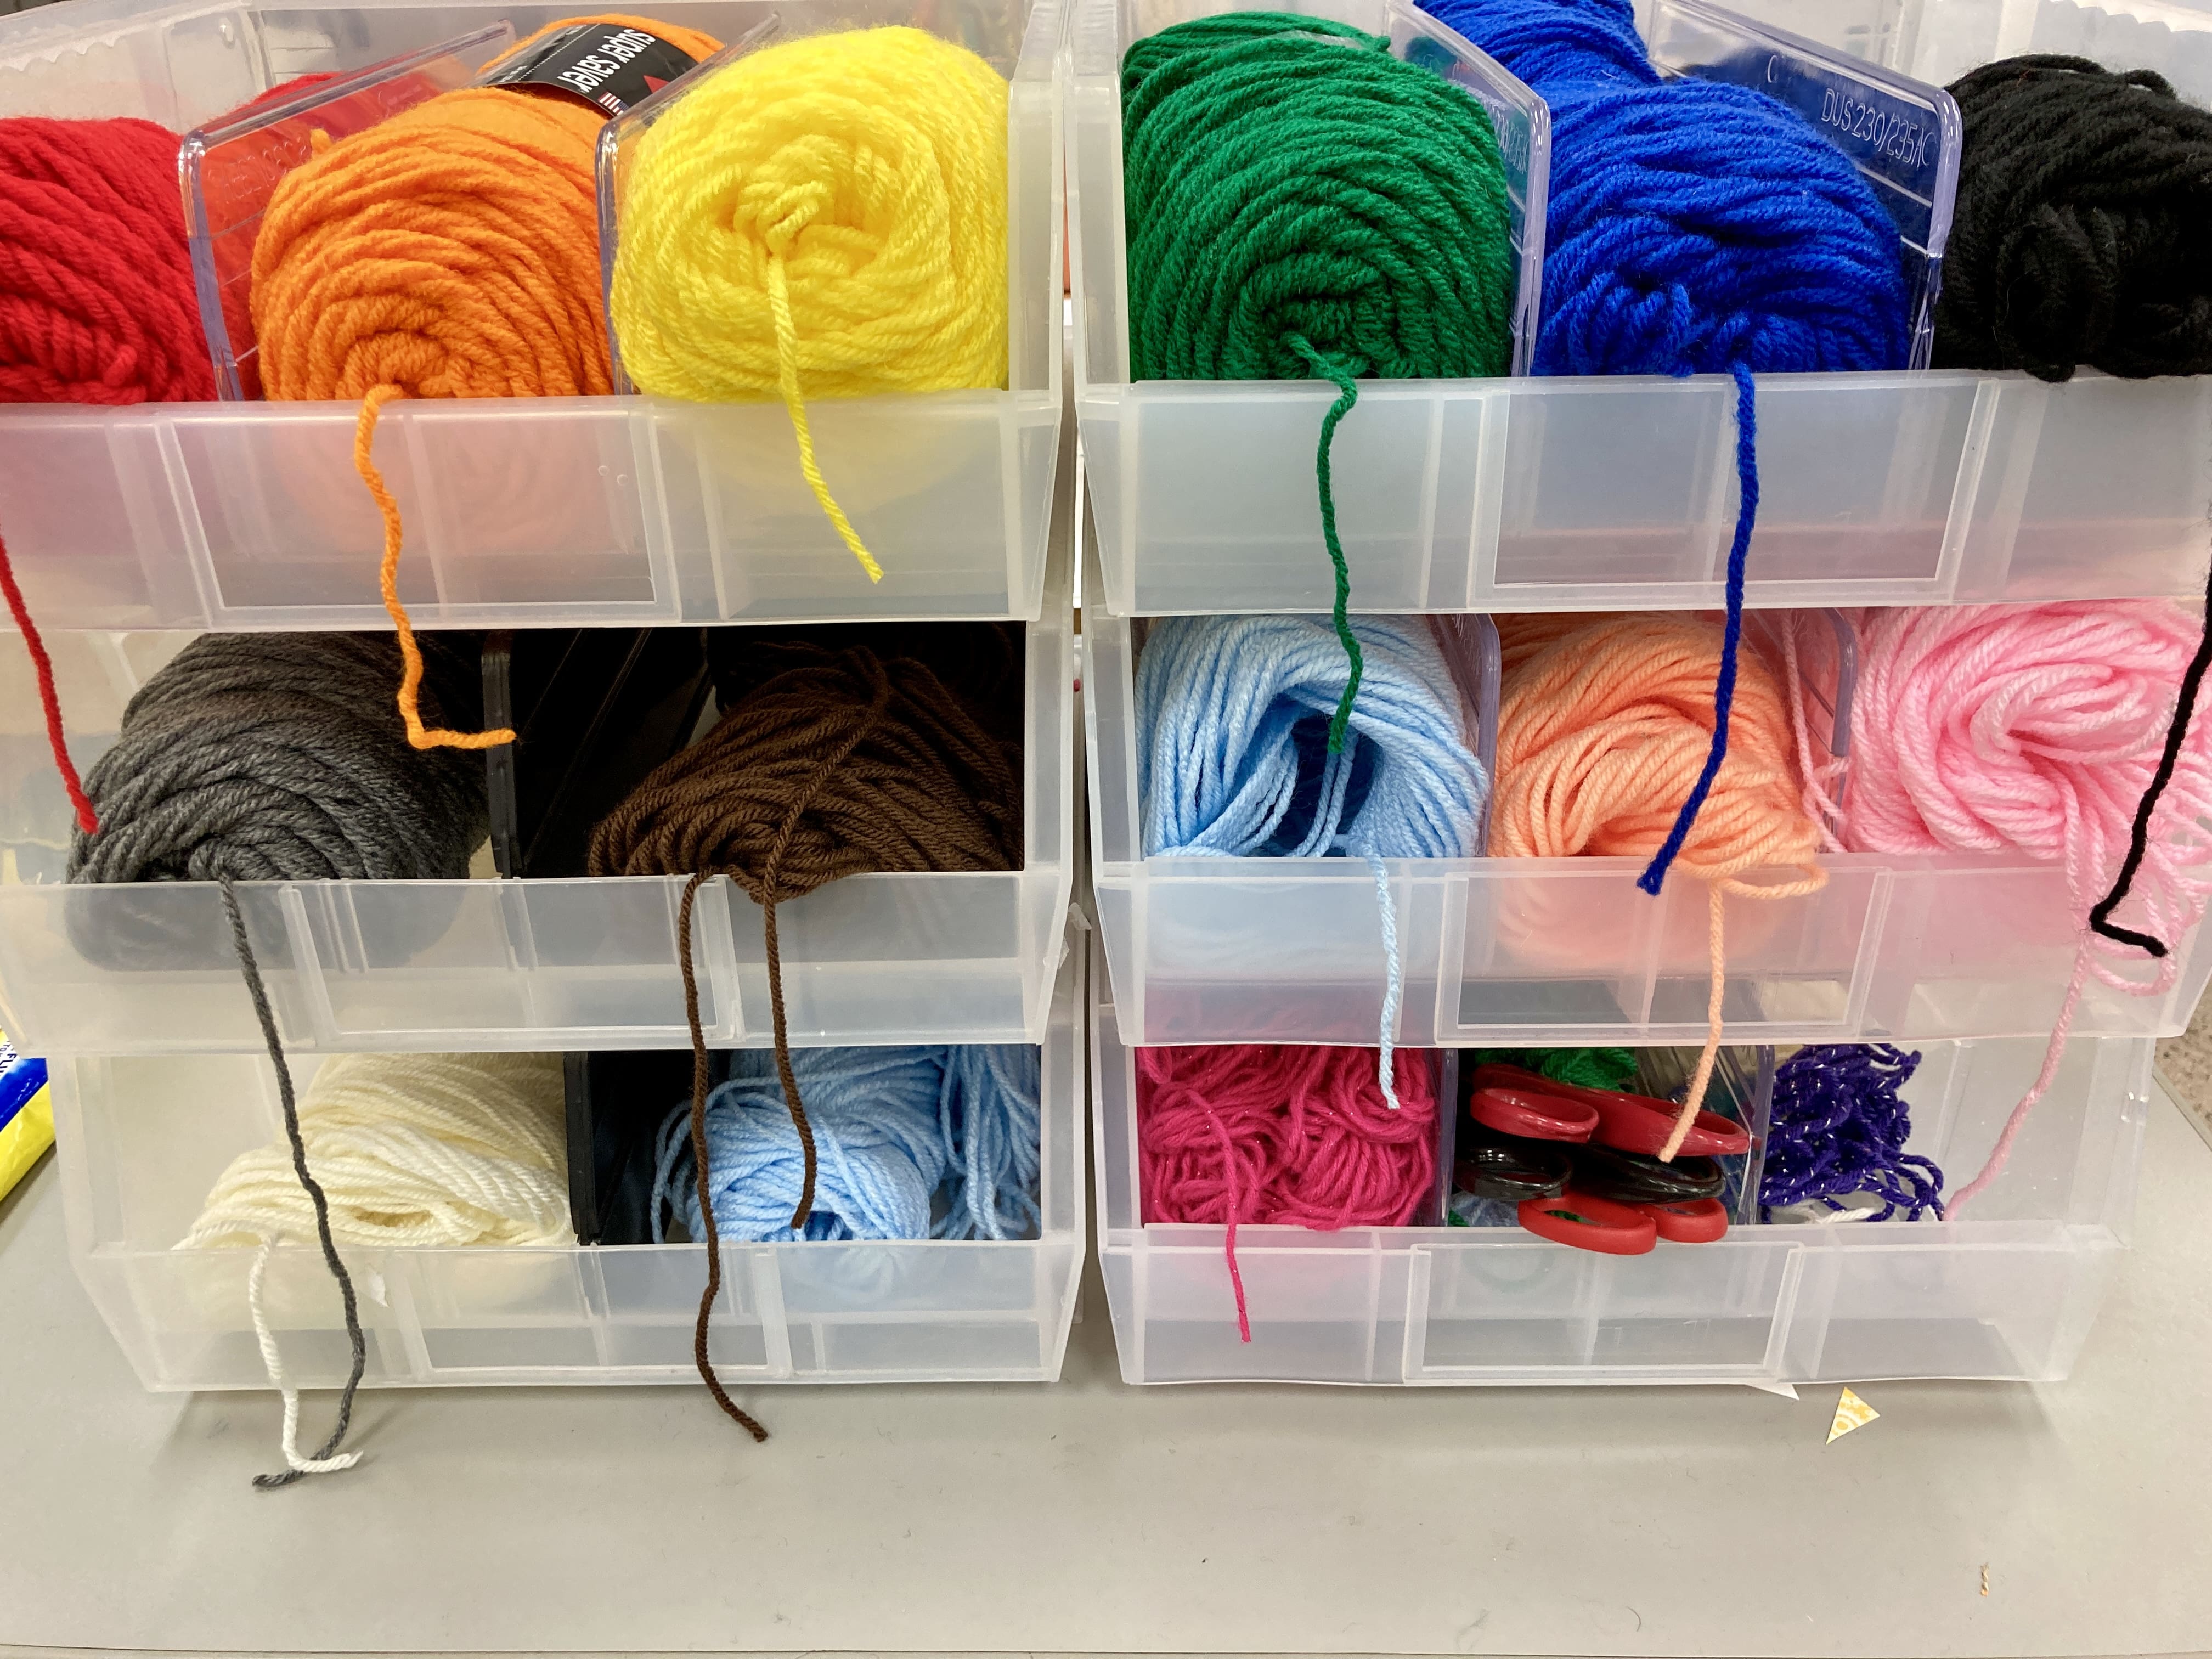
Keeping all those colorful yarns organized can be a little tricky! I have tried many different ways of organizing it and this new system is by far the best. Each skein is placed in its own little compartment and the yarn is dispensed from the middle of the skein. Taking the time to teach this little procedure will save your sanity. Trust me!

Pretty little yarns each in their own little house!

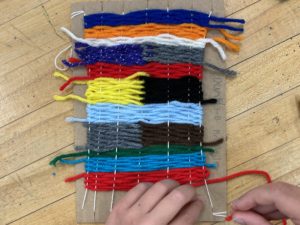
I encourage all my students to attempt a box design and of course they love to learn the rya.  Most of my students choose the fringed rya at the bottom of their weaving.

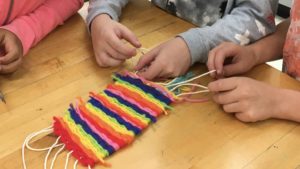
Once all the weft yarns are woven, the kids helped each other tie up all the loose ends and took off the cardboard. They got really good at tying knots!

Friends helping friends tie knots!

Here are our finished projects at last year’s art walk.

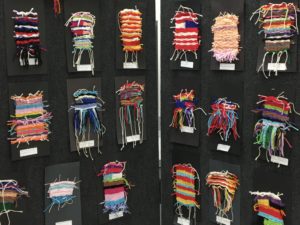
I am so proud of my amazing weavers!

How to Weave on a Cardboard Loom! Read More »

Scream Portraits

Inspired by Edvard Munch

Self portrait inspired by the Scream

The Scream

I painted the picture, and in the colors the rhythm of the music quivers. I painted the colors I saw.

Edvard Munch

This week my third grade students created self portraits inspired by Edvard Munch’s The Scream.  We added our own twist by using the tried and true straw blow watercolor painting for the hair.  I love this project because it combines drawing portraits with the process art of straw blow painting. 

Day one – Drawing the Portrait

After a discussion about the artwork we set off to draw our portraits.  Students used mirrors to look at themselves and what their face would look like with their mouths open.  We used a simple guide for the placement of facial features and proportion and set off drawing very lightly with pencil. 

After drawing the outline of their portrait, students designed their t-shirt or whatever they were wearing that day. Finally, they chose skin tone crayons to color in the face and neck.  It is important to have some multicultural or skin toned crayons on hand in the art room.  I love the people colored crayons that I got from Lakeshore. The students took great pride in choosing their exact skin color.   

Day two – Fun Stuff! Blowing the Paint!

The second day we set up our workspace for the straw blow painting. I placed a palette of liquid watercolor paint between every two kids.  We practiced dipping our straws in the paint and placed ONE drop on the top of the head and tapped out the excess paint in the straw on to a paper towel.  This step is important because any paint left in the straw will SPLAT on the paper instead of streaming up the paper. 

Once the drop was in place, the students blew air through the straw to direct the paint to travel up the page.  Blow painting with straws is a fun activity for children because it provides such a great opportunity to experiment with color and color mixing and different ways to paint other than using a paintbrush.

This is a show stopping project, kids love the process and parents love the product.  I love it because it is a perfect fall portrait project that combines technique with all of the above!

Take a look of some of these amazing screaming portraits!

Scream Portraits Read More »

Painted Collaborative Wings

Our school wide art project

Wings

She was here!!  Oh my gosh! Oh my gosh!

Kelsey Montague!  She was here in my town painting beautiful interactive murals all over my city and I missed it!  Here I am teaching my kiddos all about her, watching her videos, looking at her work and creating our very own tribute to her beautiful murals and she was here… last month.  Oh, what I would have given to be able to go see her in action, painting wings and -gasp, meet her!  But, I missed it…  

Wings in Scottsdale!

One of my students came up to me and casually said “I saw the wings.”  What?  Where?  “At the hockey arena.”  Wait. What?  I frantically typed her name and PHOENIX into the search engine and there were not one but FIVE new beautiful murals around town! 

How could I have missed her?  For the past few weeks my classes have been talking about murals and looking at the beautiful work of Ms. Kelsey Montague.  We are in the process of creating beautiful painted wings for a mural that students can interact with and invite our community into our annual art walk.  This year our art walk is combined with our science night for a fabulous STEAM night event we are calling A Night in our Museum!  

We started by painting papers.  Each grade level focused on painting different color values of our chosen color palette. Students used their color with white and then black to create beautiful value scales on mixed media paper. By the end of the week, we had A LOT of painted papers! 

Students then used white prisma color pencils to design their individual feathers.  My amazing PTO moms helped me assemble and seal the painted paper feathers to two 4×8 painted wood boards. 

Our finished mural was 4 feet tall and 16 feet wide and it is SO fabulous! It was a hit at the STEAM night! The kids loved standing in front of the installation for a photo opportunity!

Our amazing collaborative mural inspired by the fabulous Kelsey Montague now proudly hangs in our school hall.

Click here to find Kelsey Montague Art wings close to you!

Painted Collaborative Wings Read More »

For the Love of Eric Carle

Collaborative mural by Blooming Artists – Enrichment Class Spring 2020

My heart broke the day I heard that our beloved Eric Carle had passed away.  For 91 years he filled the hearts of children, and the young at heart, with joy with his whimsical and colorful art made especially for kids.

“In the light of the moon, holding on to a good star, a painter of rainbows is now traveling across the night sky”

In case it is your first day on this planet and you have never heard of Eric Carle, he is the author and illustrator of wonderful children’s books such as The Very Hungry Caterpillar, The Very Busy Spider, The Grouchy Ladybug and so many more.  I have read them hundreds of times to my children and students alike.  So many of my art lessons are inspired by his colorful and whimsical illustrations.  Every one of my students know how to create beautiful painted papers and use them for their collage art in the fabulous Carle style.

One of my bucket list items was to visit the Eric Carle picture book museum in Amherst, Massachusetts.

If you haven’t had a chance to visit, for Carle lovers, it is a dream to see his original artwork and story boards for his books. Housed in a museum filled with his enormous playful paintings, walking into this museum is like walking into one of his books! For a quick glimpse inside click HERE

Kindergarten Texture Turkey

This week my kindergarten classes have been learning about Eric Carle’s collage art style.  We have been reading his books and having lengthy discussions about how he created his beautiful painted papers.  We painted papers to create these adorable painted paper texture turkeys.

Aren’t these little texture turkeys fabulous?

The process is easy:

We used very well used messy mats (12×18 construction paper) that were pretty much covered with all colors of paint anyway. 

  • Paint the entire paper with one color tempera paint
  • Add dots or stripes in a second color
  • Use texture tools, rollers or scrapers to add texture
  • Repeat as long as time allows

I love this process for children of all ages.  It is such a wonderful process in creating beautiful papers for very rich looking artworks.

Students had fun painting their papers and using the various tools to create interesting and varied designs and textures on their papers. 

What Eric Carle inspired projects do your classes create?  Let me know in the comments below.

For the Love of Eric Carle Read More »